

Showdown
The setting: High noon, a British pub somewhere in Santa Monica.
The players: Alwyn Cosgrove, the Scottish strength and conditioning terror now based in California, and Chad Waterbury, the gunslingin' performance guru from Arizona.
The shootout: The two sought-after trainers had met to throw down on the topic of training methodology. This meeting could have ended in two ways: in a head busting barroom brawl or in the formation of a new alliance.
After much heated debate (and not a few pints of ale), something became very clear: both strength experts began to realize that their underlying values, methods, and philosophies had much in common. They quickly learned that the other had something very valuable to offer. Indeed, the sum of these voices appeared to be much greater than the individual parts.
As the afternoon came to a close, Cosgrove and Waterbury built a bond held together by the most powerful adhesive agent of all: respect. You're about to embark on a shoulder building routine from two of the top players in this field. Get ready to test, repair, and monster-size your shoulders!
Cosgrove Jumps Into the Ring
Shoulder training is interesting; it's one of the most popular subjects in fitness and bodybuilding magazines. Shoulder rehabilitation is also interesting; it's one of the most talked about orthopedic issues in the rehabilitation industry. Even here on T-Nation, the most talked about injuries seem to be shoulder girdle related. Hmm, could there be a link? I think so!
The shoulder girdle is subject to frequent injuries partly because of strength imbalances around it (i.e. people use more volume and more load when they bench press than when they do any type of rowing). Improper loading parameters when training the shoulder directly is another factor leading to frequent injury.
In an attempt to circumvent shoulder problems, it's important for you to determine whether or not your shoulders are healthy enough to be loaded. Physical therapists have a ton of evaluation tools they use to determine what exactly is injured. However, most of us don't see a PT until we're already banged-up.
What Chad and I devised is a method for screening your shoulders to determine whether or not you're ready for loading. In other words, are you an injury waiting to happen?
If you fail the following screens (taken from Gray Cook's Functional Movement Screen), start with Phase I of the program. If you pass with flying colors, start with Phase II. If in doubt, start this program with Phase I. In doing so you'll be sure to reap the greatest benefits from the program.
Quick Fiery Scot Aside: The popular term for routines similar to the following Phase I is "prehabilitation." This is a bullshit term that fitness professionals have come up with to mean "injury prevention."
I fucking hate that term. It implies that there's something different about this type of training, and that all other forms of training are "injury promoting." As a fitness coach I feel all training should be aimed at preventing injury!
Big Rocks Theory
Before we start, a quick story:
A professor addressed a group of business students. He pulled out a one-gallon Mason jar and set it on the table. Then he produced a dozen fist-sized rocks and placed them into the jar. The professor asked, "Is the jar full?"
"Yes," the group said.
Next, he reached under the table and pulled out a bucket of gravel. He dumped the gravel in with the big rocks and shook the jar. He asked, "Is the jar full?"
By this time the class was on to him. "Probably not," one student answered.
Then the instructor reached under the table and grabbed a bucket of sand. He dumped the sand, which went into all the places between the rocks and the gravel. He asked, "Is this jar full?"
"No!" the class shouted.
Next, he grabbed a pitcher of water and poured it into the jar until the jar was filled to the brim. He said, "The truth this illustration teaches us is this: If you don't put the big rocks in first, you'll never get them in. Put the big rocks in first."
The Theory Applied
It's important to understand that when any strength coach talks about specialization routines, he's honestly talking about the "water in the jar." The big rocks - squats, deadlifts, rows, etc. - should all still be mainstays in your program.
I believe that if a program contained squats, deadlifts, chins, dips, rows, presses, extensions, and curls, it would likely give you a 100% improvement. However, doing squats and deadlifts alone would likely be responsible for 50% of that improvement.
So, before you get into our routine, make sure the big rocks are firmly in place!
Screening Tools
Mobility Test: First, we start by measuring the length of your hand by using the distance from the bony part on the outside of your wrist to the tip of your middle finger. Now make a fist and put your thumb inside.

Reach over your shoulder and down behind your head with your right hand, and around your back and up with your left hand. We then measure the distance between the fists. Perform on both sides.

A perfect score ("A") would have your fists within one hand length. A "B" score would have your fists within one-and-a-half hand lengths. A complete "you suck" score would have the distance outside of one and a half hand lengths.
Active Impingement Test: Place your hand on your opposite shoulder and try to point your elbow upward without your palm leaving contact with your opposite shoulder. If you can't break parallel with the floor or the movement causes pain, you fail the test. (Interestingly, some guys will get pain; others will have no pain, but a poor range of motion or ROM. It's as if their bodies won't allow them to go into the painful ROM.)

"Dude, I failed. What does this mean?"
First of all, the very fact that we've identified a potential problem has probably saved you. But why did you get a poor score? There are a few reasons.
In sports, there's a widely-held belief that external rotation with overhead athletes is gained at the expense of internal rotation (the previous test addressed both). There's also the typical bodybuilder postural changes (i.e. rounded shoulders, forward head posture) caused primarily by overdevelopment (shortening) of the pecs and lats in relation to their antagonists. A "you suck" score may indicate some problems in movement of the scapula and thoracic spine.
Phase I: The Program
Phase I is designed to address any shoulder problems that might exist. You might be surprised that this workout is challenging! If you failed the above test, do not skip this routine (unless you're excited about making your orthopedic surgeon's Mercedes Benz payments).
Daily Mobility Work: Sit in a chair that comes up to the middle of your back. Put your hands behind your head, lift your elbows to the ceiling, and bend backwards over the back of the chair. Using the chair as the fulcrum, you'll develop thoracic extension. The thoracic extension exercise should be performed for 10 repetitions, every 2-3 hours.
Pre-Workout: Thoracic mobilization work on the foam roller (same as above only lying supine across a foam roller).
The Workout
| Exercise | Sets | Reps | Rest | |
|---|---|---|---|---|
| A1 | Reach, Roll and Lift (in "rock" position below) | 2 | 5-10 | 10 sec. |
| Pause 2 seconds at contraction. | ||||
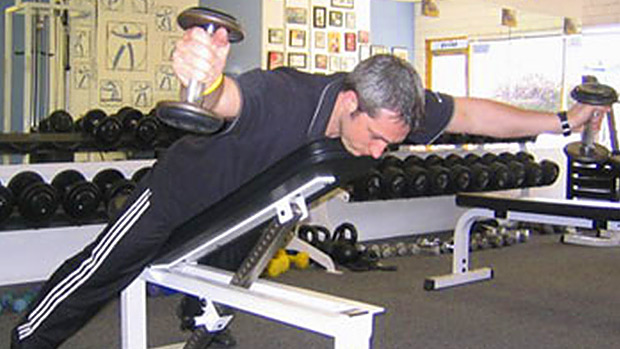
Position: "Rock" position - Chest on your thighs, glutes on your calves, and hands reached out flat and facedown. Head should be down.
Movement: Slide one hand out as far as possible and externally rotate hand so palm faces ceiling. Lift arm upward without the chest moving away from thighs. Return to starting position and switch sides.

Start Reach

Roll and Lift
| Exercise | Sets | Reps | Rest | |
|---|---|---|---|---|
| A2 | Dumbbell External Rotation | 2 | 10/arm | 10 sec. |
| Pause for 2 seconds, three times during the negative phase of contraction. | ||||

| Exercise | Sets | Reps | Rest | |
|---|---|---|---|---|
| A3 | L-lateral Raise | 2 | 10-12 | 90 sec. |
| Pause for 2 seconds at contraction. Because of the forward position of the dumbbells relative to the torso, this variation of the lateral raise stresses the rotator cuff more effectively. | ||||

| Exercise | Sets | Reps | Rest | |
|---|---|---|---|---|
| B1 | YTWL | 2 | 8-12 | none |
| Rest 0 seconds between variations. Pause for 1 second at contraction. | ||||
Y

T

W

L Part 1 — L Part 2
| Exercise | Sets | Reps | Rest | |
|---|---|---|---|---|
| B2 | Seated Cable Row with Rope to Neck | 2 | 12-15 | 90 sec. |
| Pause for 1 second at contraction. | ||||

| Exercise | Sets | Reps | Rest | |
|---|---|---|---|---|
| C | Push-up Plus on Swiss Ball | 2 | 15 | 1 min. |
| No pause at either stretched or contracted position. This is just a push-up performed with your hands on the stability ball; however, at the end of the rep (the "plus" position), the shoulder blades should be pushed as far forward as possible. | ||||

| Exercise | Sets | Reps | Rest | |
|---|---|---|---|---|
| D | Static Stretching of the Lats and Pecs | 2-3 | 1 min. | |
| Progressively increase duration | ||||
Additional Points
- This program should replace your regular shoulder workout for the next four weeks.
- Perform the workout every five days, before any other exercises.
Now that your shoulders have been effectively primed for size, strength, health, and performance, it's time to move on to Phase II.
Phase II: Enter Waterbury
Apparently, no one seems to be satisfied with their shoulder development. How can such a provocative statement be made? Because shoulder training articles are hugely popular!
Think about it, if most trainees were satisfied, they wouldn't continuously seek out programs to build the size, strength, and health of their shoulder musculature. Obviously, this issue needs to be addressed.
Most trainees haven't built up their shoulders to respectable proportions because they lack complete understanding of structure and function. Indeed, structure determines function. And a thorough understanding of function will delineate what muscles should be worked, and how. Therefore, the issue of shoulder structure and function must be first addressed to help you tackle your underdeveloped, shoulder training woes.
Structure and Function: A Complex Issue
To say the shoulder joint is relatively complex is a lot like saying Elisha Cuthbert is kinda hot. A better way to say it would be this: The shoulder region represents the most complex joint structure in the human body! That's why biomechanics refer to the region not as the shoulder joint, but as the shoulder complex.
Such structural complexity is necessary to allow you to perform a plethora of movement patterns. It's much more complex than other joints that are notorious for sidelining your efforts. Think of the knee joint: what can it do? Basically, it can flex or extend. Now think about the shoulder joint: what movement patterns can it induce? Are you running out of movements? Good, then it's time for your lesson.
The shoulder complex is comprised of three segments: the scapula, the clavicle, and the humerus. These segments are controlled by the following structures: the scapulothoracic (ST) joint, the sternoclavicular (SC) joint, the acromioclavicular (AC) joint, and the glenohumeral (GH) joint.
Some joint experts also include the coracoacromial arch (also known as the suprahumeral joint) when describing the shoulder complex. But we'll stick to the first four structures for the sake of simplicity. It must be mentioned that it's very difficult to separate the functions of each structure since much overlap occurs during movement. Nevertheless, here goes.

ST Joint: The ST joint moves the scapula in the following ways: elevation-depression, abduction-adduction (protraction-retraction), and upward-downward rotation.
SC Joint: This joint is particularly important since it's the only structural attachment, via the clavicle, between the scapula and the rest of the body. The SC joint performs the following clavicular functions: elevation-depression, protraction-retraction, and rotation.
AC Joint: The AC joint attaches the acromion of the scapula to the lateral clavicle. While some discrepancy exists regarding the function of the AC joint, Morris' observations seem to be most consistent with other experts. Therefore, the AC joint appears to induce scapular rotation, winging, and tipping (1). Basically, the AC joint allows the scapula to stay in line (move) with the curvature of the ribcage during arm movements.
GH Joint: The GH joint is located between the head of the humerus and the glenoid fossa of the scapula. This joint is the site for much pathology such as degeneration and derangement. In fact, many experts consider the GH joint to be a sloppy arrangement since it can wreck havoc on your shoulder health.
Ever heard of the rotator cuff? I bet you have. And you're probably familiar with it since its role is to stabilize the nasty GH joint. Therefore, your rotator cuff must be iron-clad to protect this volatile structure.
All four of the aforementioned joints integrate to control the function of the shoulder complex. A large ROM can occur at the GH joint (120° of flexion and 90-120° of abduction), but it must be aided by the SC and AC linkages for full movement capabilities. Indeed, a maximum elevation of 180° requires the input from all available structures. The concerted effort of all four structures allows for scapulohumeral rhythm.
Now that we've identified the major joints of the shoulder complex, it's time to get to the good stuff: muscles!
Muscles for Function
It's commonly accepted that elevation and depression are the two primary patterns of shoulder complex function (2). Therefore, in order to build your shoulders up to astonishing levels, we must train the musculature that work to perform elevation and depression in addition to all secondary functions. Here they are:
- Shoulder Complex Elevators: deltoid, supraspinatus, infraspinatus, teres minor, subscapularis, upper/middle/lower trapezius, rhomboid, and serratus anterior muscles.
- Shoulder Complex Depressors: latissimus dorsi, pectoral, teres major, and rhomboid muscles.
You might be surprised by a few of the aforementioned muscle groups. After all, most people don't think of training their lats, rhomboids, and serratus muscles to build up bigger shoulders. Ah ha! Have we pinpointed the problem?
If you perform nothing but side raises and overhead presses in an effort to build more musculature shoulders, you're going to be severely disappointed. The body doesn't want to build muscle groups out of proportion. This "protective" mechanism keeps you from predisposing yourself to injury. Therefore, you must train your primary movers that surround and support the shoulder complex.
This reasoning is akin to building your upper back in order to support more muscular arms. Now do you see why Alwyn and I are proponents of looking at the "big picture" first (think back to his "Big Rocks" example)? You must put in the big rocks first: you must develop your primary movers to support growth of your shoulder musculature.
With that in mind, it's time for Phase II!
Phase II
Workout 1
| Exercise | Sets | Reps | Load | Rest | |
|---|---|---|---|---|---|
| A | Snatch Grip Deadlift | 2 | 6 | 6RM | 2 min. |

| Exercise | Sets | Reps | Load | Rest | |
|---|---|---|---|---|---|
| B1 | Upright Row | 3 | 8 | 8RM | 10 sec. |
Note: Use a barbell, dumbbells or EZ curl bar
| Exercise | Sets | Reps | Load | Rest | |
|---|---|---|---|---|---|
| B2 | Side Raise on Incline Bench | 3 | 8 | 8RM | 10 sec. |

| Exercise | Sets | Reps | Load | Rest | |
|---|---|---|---|---|---|
| B3 | Wide Grip Pulldown | 3 | 8 | 90 sec. |
Note: Lean back slightly and pull down to your upper chest until your scapulae are fully retracted.

| Exercise | Sets | Reps | Load | Rest | |
|---|---|---|---|---|---|
| C1 | Incline Dumbbell Shoulder Press | 2 | 10 | 10RM | 10 sec. |
Note: Perform on a 60-75 degree incline. Your palms should face each other throughout movement. Keep your elbows tucked to your sides as you lower.

| Exercise | Sets | Reps | Load | Rest | |
|---|---|---|---|---|---|
| C2 | Decline Dumbbell Chest Press | 2 | 10 | 10RM | 10 sec. |
Note: Use a slight decline and keep your palms facing each other throughout. Don't lock out the elbows at the top.

| Exercise | Sets | Reps | Load | Rest | |
|---|---|---|---|---|---|
| C3 | Standing Dumbbell Front Raise | 2 | 10 | 10RM | 75 sec. |
Note: If available, perform while standing with a Swiss ball between your lower back and a wall. If ball isn't available, stand with your back against a wall. Don't lower your arms to perpendicular; instead, keep them slightly elevated at the bottom to maintain deltoid tension.

| Exercise | Sets | Reps | Load | Rest | |
|---|---|---|---|---|---|
| D | Dumbbell External Rotation | 3 | 12 | 12RM | 75 sec. |
Note: This exercise can be performed on a Swiss ball or a bench. Even though it's great for the external rotators, it's just as effective for deltoid development since the upper arm isn't supported. Don't let your upper arms fall toward the floor as you externally rotate.

Additional Points
- Perform this routine twice per week, evenly spaced, for four weeks.
- Increase the load 2-3% with each subsequent workout.
- Stretch your lats and pecs after each workout.
Conclusion
Now you have an eight week specialization plan to build shoulder integrity and girth. Once you finish, you'll be able to take pride in the fact that your shoulder function will mirror an elite athlete's and look as good as a competitive bodybuilder's!
References
- Morris, J: Joints of the shoulder girdle. Aust J Physiother 24, June, 1978.
- Perry, J: Normal upper extremity kinesiology. Phys Ther 58:265, March 1978.
related posts

The Injury Prevention Roundtable

The Truth about Training Frequency

Tip: Stress and Heart Rate Variability
