

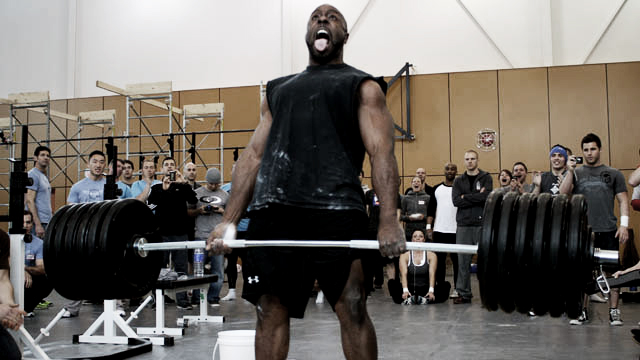
Your shins are an inch away from the bar. You set your air, set your grip, and arch your back. From the side, your set-up looks beautiful, with perfect V's at your knees and hips, along with the requisite flat back. As your feet drive hard into the floor you rip the bar up to your knees and then...disaster.
The bar stalls and you struggle mightily as your back is now rounding at an alarming rate, sending visions of not being able to roll out of bed tomorrow through your mind.
One last desperate gasp, but the weight is unforgiving and gravity's pull uncompromising. The bar crashes down. You miss the lift.
You step away from the weight angry and confused. Your training partners offer encouragement that you "almost had it," but you'll have none of it. The bottom line is, you failed.
Reverse hypers, good mornings, and glute-ham raises have become your three closest friends, along with more anterior-core work (not the flexion kind) than you care to mention, so what happened?
Chances are your upper-back isn't conditioned to do its job.
The Deadlift in Phases
Essentially, the conventional deadlift can be broken down into four phases:
- the set-up
- the initial pull
- the pull from the mid-shins to the knees
- the pull from the knees to lockout
During the set-up, pulling the lats tight helps secure the spine for the initial pull and keeps the lumbar spine in extension, while also helping to set the hips and knees at the proper angles. The mid and low-traps will also pull the scapulae back and down at this point–holding them there throughout the lift.
Once the initial pull starts, the lats continue to keep the spine stable and hold the extension of the spine established during the set-up. While the bar travels from the middle of the shins to the knees, the upper-back becomes even more important as it helps to ensure that the bar rides close to the body and an arch is held in the lumbar region.
It's during this middle phase that deadlifts are either built or broken. Holding good form during the mid-shins to knees pull is incredibly important for the success of the lift, and if form can't be held during this phase you won't be in position to lock the weight out when it gets to your knees.
Finally, we have the pull from the knees to lockout. As many competitive powerlifters know, this part of the lift can be a painstaking grind. If your upper-back isn't up to snuff and you can't squeeze your lats to finish off the final pull, then you're going to be in prime position to "hitch," a deadlifting mortal sin.
Bullying the Deadlift

After looking at how the upper-back functions throughout the deadlift, one glaring point sticks out. The spine needs to be held in extension during the whole lift; this is going to ensure that the bar travels the right path and that the proper force angles are maintained.
I realize many will read that sentence and say, "I pulled 555 last May and I rounded my back like goddamn Quasimodo." That's fantastic, but that just means the weight got "bullied."
In other words, there was enough adrenaline running through your body to tackle a moose and your glutes, hams, quads, and low back were strong enough to pull the weight despite the deficit in your upper-back. Any more weight and you would've folded like a lawn chair.
How do I know? I was that guy last year. On my second attempt, I brutalized 555. I ripped it off the floor and even though I rounded a bit in my upper-back, I was strong enough to pull the whole way through the lift.
Six hundred was a different story. My quads, glutes, hamstrings and lower back were strong enough to rip it off the floor, but when I had the bar almost to my knees I went all "camel back" and couldn't budge the bar another inch. Lesson learned.
To keep your spine in extension and to hold the bar in the right path for the lift, you need to build beastly lats, strong traps (upper, mid and low), and actually train your T-spine to extend.
Also, let's keep in mind that good form might have to be held for a relatively lengthy period of time.
Without further ado, here's how to train for it.
Holding the Upper-Back Tight: 6 Training Tips
Just to recap, holding the upper-back tight (scapulas "back and down" and squeezed lats) will keep your spine more stable (allowing you to generate more force), help you maintain lumbar extension (allowing you to keep good angles) and, at the risk of sounding like a broken record, keep the bar in a good path.
Here are some key points on training for a tight upper-back:
1 – Train for Thoracic Mobility
If your thoracic spine doesn't move properly, you're not going to achieve the extension you need to maintain. There are many drills out there that will help to mobilize your T-spine and some of my favorites are thoracic extensions on a foam roller or PVC pipe, quadruped extension/rotations, side lying rotations, and mad cats. Build at least one T-spine mobility drill into your warm-up every time you train, regardless of the split.
2 – Carry Things Like a Farmer
Seriously, if you aren't already including farmer's walks in your programming, start! They're often discussed as a "bang for your buck" exercise for the core and grip, but let's think about the effect they have on training upper-back tightness. Your upper-traps are held under tension for the entirety of the lift (just like the deadlift), your mid and lower-traps as well as rhomboids have to work to retract and depress your scaps for you to hold proper posture, and your lats have to be pulled tight to support everything.
3 – Add in Some Front Squats
Not only will front squats help you develop man-tastic quads and a strong anterior core, but they also put your traps, rhomboids, and lats under some serious isometric tension. Cycle them in on your leg days and you'll significantly improve your upper-back strength – that is, if you hold great form. I prefer the clean grip because it forces you to keep your elbows high and your scaps back and down.
4 – Use Concentric Holds
Concentric holds on rows and vertical-pulls have been a staple in my programming for clients that need a lot of postural corrective work, which makes them great for reinforcing the "back and down" positioning of the scapulas, even in people that aren't kyphotic or plagued with scapular instability. You can progress in two ways that both work very well.
The first option is to start with a lighter weight and do less reps with a longer hold – doing sets of 5 with 10-second holds is a good starting point. Progressing from there, add reps and drop the time, or add weight and drop reps and time.
That's how I usually progress people with poor posture, but for the lucky few that stand erect, starting with a heavier weight with shorter duration holds works beautifully. Starting with 3-second holds and progressing up to 5-seconds in a given rep range is a good start. Concentrate on pushing your chest out and squeezing your back tight for the entire hold.
5 – Do Your Overhead Presses Standing
It's a lift that either gets a lot of love or a lot of hate. Admittedly, they aren't for everyone–especially those with any kind of capsular problem in their glenohumeral joint, AC joint dysfunction, or scapular instability.
However, if you're going to do overhead presses, help your deadlift out by doing them standing. Standing military presses force you to keep upper-back tightness while concurrently keeping your abs, glutes and low back tight. Sounds a lot like a deadlift, doesn't it?
6 – Do Rack Pulls

Rack pulls have gotten a lot of bad press. Many guys say they're useful for building mass but don't necessarily carry over to the deadlift. In my opinion, that depends on how they're used. If Tommy Tuffnuts sets up to do rack pulls with the bar set an inch above his knees so he can barely pull twelve plates for two and yell, "Who wants some?" to feed his small-man ego, then doing a rack pulls is worthless.
But if the bar is set at least an inch below the knee and perfect form is held while progressively setting the pins lower each week, then rack pulls are a great option.
Of course, the next argument is that setting up in a rack already puts you at an advantaged position and most lost pulls are the result of being in a disadvantaged position. To that, I ask, "What if teaching your body, especially your upper-back, to pull from an advantaged position could help prevent you from getting caught in the infamous disadvantaged position to begin with?"
In other words, use rack pulls to teach yourself better form by progressively working lower to the ground and focusing on tightness and they'll help you improve as a deadlifter.
Movements for Building Beastly Lats and Traps
The above points will improve your deadlifting form, but they won't help nearly as much if you don't also build big, strong sets of lats and traps. Here are some programming considerations for some of the exercises above along with a few more badass exercises and rep-schemes to ensure that your upper-back is fit for a deadlift challenge.
8, 6, 15 One-Arm Rows
8, 6, 15 is my favorite rep-scheme for one-arm rows. It's a great method for producing some serious size and strength gains in the lats and traps. Start by picking a dumbbell that you could row for a solid 12 reps. This will be your 8-rep weight and you'll use it as a warm-up.
Now things get serious. For the next set, grab a dumbbell that you think you can row for 1 or 2 reps and do it for at least 3. Next week you'll have to get at least 4, and so on in subsequent weeks until you reach your goal of 6 reps. If you hit 6 reps the first week, you're done with that weight and you move up 5 pounds next week.
The 15-rep set works exactly the way the 6-rep set does, only for this set you'll start with at least 12 reps and work up to 15. To start out with a good weight for the 15-rep set, use 80% of your 6-rep weight. Pushing yourself is a must with this rep-scheme.
Heavy Pull-ups, Rep Pull-ups, Total Volume Pull-ups...Just do Pull-ups!
You need to be doing a lot of pull-ups every week, and heavy. If you can't do pull-ups, or have trouble with them, check out Tim Henriques' Programs For the Pull-up Deficient to fix your problem.
If you can do pull-ups, then you have no excuse–get off the lat pulldown. Work them into your program at least three days per week and hit all three grips.
On the first day, strap on an X-vest or dip belt and do them heavy for no more than 6 reps, cycling down to 3's. Your second pull-up day will be a total volume day. Do them throughout your workout, using reps that aren't pushing you to fatigue. Set a total rep goal and make sure you hit it. Use the last day to test your manhood. Grip the bar and pull your chin above it as many times as you can for three sets.
Don't forget to cycle your grips with the rep-schemes. For example, for one cycle do the heavy day pronated, total rep day supinated, and the balls out day neutral. At the end of that cycle, or once you have hit all your goals, rotate grips and days.
Programming for Farmer's Walks
Farmer's walks are an incredibly versatile exercise and can be used in just about any way imaginable, so use your imagination! To spur your thought process, here are a few options.
- Use farmer's walks in place of a pull exercise on one of your upper-body days. Combine them with your main push exercise as part of your direct assistance work or as an auxiliary exercise. Just keep in mind that your grip will be taxed, so plan accordingly.
- Everybody loves a finisher! When deciding on a finisher for your next workout, grab some dumbbells, a trap bar, or whatever you can use for a farmer's walk and set a total distance goal. If you aren't a veteran of the FW, start on the low end for total distance. Between 50 and 100 total yards should do the trick. Work up to 200 total yards with one weight and then add weight and drop back down in distance, working back up to a new total distance goal.
- Add them to your other conditioning circuits. Throw in the farmer's walk during your sessions of prowler pushes, car pushes, sled drags, and sledge hammer swings. It doesn't have to be complicated. Just do them!
Rack Pulls: Great for Form, Great for Size
We talked about how rack pulls are great for teaching upper-back tightness during the deadlift as it applies to good form, but using them to build thickness in the upper-back is also a great idea. Just remember to keep them below the knee and use a manageable weight.
I like to use them as a second exercise on a lower-body day, staying in a middle rep-range, somewhere between 5's and 8's. Rack pulls are also great as a rep-exercise at the end of a workout. Hit them for sets of 12 to 15. Using both rep-ranges for rack pulls will help to build some serious mass and density in your lats and traps.
Conclusion
Everyone knows how important the glutes, hamstrings, and low-back are when it comes to being a successful deadlifter, but making sure your upper-back is ready for duty is just as important. Train your thoracic spine to extend, build some serious lats and traps, and learn how to hold them tight and you'll be one step closer to a monster pull.
related posts

Question of Power 5

Tip: The Truth About Push-Up Handles
Tip: Banded Close-Grip Bench Press
