This article will be somewhat different than those I usually write. Instead of taking on one subject and detailing it thoroughly, I'm going to talk about several training tips, exercises, or methods that I find effective. I won't expound too much on the science behind these topics; instead I'll keep it short, simple, and as practical as possible.
Maybe not all of the subjects covered will interest you; however, I'm sure there'll be a little something for everybody! In this installment I'll cover neck training, the value of posing, feeder sets, and functional isometric training.
I've received a lot of e-mails asking me for tips on how to train the neck. I believe a strong neck is key in many sports, both to improve performance and to help prevent injuries.
The following program is the one I use with a race car driver I train. Race car drivers need a lot of strength and strength-endurance in the neck muscles to keep their head straight and focused on the road despite the G-forces trying to knock it off!
The "G-Force" Neck Building Routine
A. Neck support with Swiss ball (warm-up)
This exercise is mostly to warm-up the neck muscles for the hard work to come. It can also increase proprioception in the neck muscles. The drill has four positions, each position being held for thirty seconds. The four positions are illustrated below.
 |
 |
 |
 |
B. Lying Isometric Neck Flexion
In most sports, having a neck that can sustain high forces in a static contraction is very useful. For this drill, lie down on the floor (or a bench) with a plate on your forehead. Flex the neck to bring the head up as much as possible and hold the position for sixty seconds. Do two sets of this exercise.
 |
C. Hercules Neck Harness Extensions
This exercise will require a neck harness. I like the "Hercules" model from Ironmind.com. I strongly suggest you make this investment. Simply put, you can't train the neck optimally without a good harness.
For this first drill with the harness, bend the legs and place your hands on your knees. The exercise is done by lowering the head and then extending it as much as possible. Perform three to six sets of 20 reps. I suggest you slowly build up the volume over time.
 |
 |
D. Hercules Neck Harness Flexions
This is the second exercise with the harness. You'll need to lie down on an incline surface or lean back (as shown in the pictures) with the weight hanging behind you. Start by bringing the head back, then flexing it back up. Once again, do 20 reps per set and anywhere from three to six sets.
 |
 |
E. Hercules Neck Harness Forward Hold
This drill is similar to exercise C. Place your hands on the knees, but instead of lowering your head and bringing it back up, simply keep it up as high as possible and hold the position for two minutes. Do one to three sets of two minutes per workout.
 |
F. Hercules Neck Harness Backward Hold
This drill is similar to exercise D, but just like in the preceding drill you hold the fully contracted position for two minutes. Once again, do one to three sets of two minutes.
 |
The G-Force routine is to be performed once or twice per week. It'll give you a bull neck in no time, something that any football player, wrestler, hockey player, martial artist, or race car driver needs!
I vaguely remember being a frail fourteen year old boy, almost lost in a gym, hearing a big bodybuilder shouting, "Hey guys, today is mirror training!" For these competitive bodybuilders, "mirror training" (posing) was important because it could influence how they'd do in their shows.
One thing I noticed is that when they were practicing their posing, their muscle density and their degree of leanness would increase at a much faster rate than usual. This intrigued me to no end. Now I understand that posing practice actually involves a lot of muscle control and maximal static and quasi-static muscle contractions. While not sufficient to stimulate hypertrophy gains, this type of training can increase energy expenditure, improve neural activation of the muscles, and help you develop better muscle control.
Don't get me wrong, I don't recommend devoting a training day to posing in the gym (freaks!). However, when your goal is to get very lean and dense, including a weekly posing session lasting 30 to 45 minutes (preferably at home when you're alone!) can really make a difference in your appearance. I'd recommend holding each of the mandatory bodybuilding poses (there's seven of them, eight if you count the "most muscular") for sixty seconds and repeat the cycle two or three times. Concentrate on fully contracting the muscles at all time. The contraction must be maximal.
This advice may sound vain or narcissistic but it's actually grounded in science! Muscle control really is improved and so is muscle tonus, thus you'll look denser and more muscular and it'll actually help you with your lifting performance. Now, who's up for some mirror training?
The concept here is simple: after a few heavy sets of a given exercise, drop down the weight and rep out. This is often called a "back off set," but I personally prefer the term feeder set. "Back off" has a somewhat negative connotation and really doesn't say much about the use of the set.
On the other hand, "feeder set" is more appropriate as it explains why this form of training is useful: it'll increase blood flow to the muscle, thus bringing in more nutrients which will increase amino acid and glycogen uptake by the muscles. In short, you'll be able to adapt more rapidly to your heavy training!
What I like to do is drop the weight to 50 to 60% of what I used for my heaviest set and perform 10 to 12 more reps. If my heaviest set was 5 reps with 350 pounds, my feeder set would be approximately 15 to 17 reps with 175 to 210 pounds.
Feeder sets are unnecessary if your heaviest set was for more than 8 to 12 reps, as doing that many reps will significantly increase blood flow on its own and the feeder set becomes redundant. Also, feeder sets don't have to be performed after every single exercise. I only suggest using one feeder set per muscle group on the last exercise used for that muscle group. However, some people respond better to feeder sets after each exercise. It's up to you to find out what works best in your case.
Here are some general guidelines:
Load of heaviest set: 90-100% of 1 rep max
Reps in heaviest set: 1-4
Load for feeder set: 60-70%
Reps for feeder set: 10-15
Load of heaviest set: 80-90% of 1 rep max
Reps in heaviest set: 5-8
Load for feeder set: 50-60%
Reps for feeder set: 15-20
Load of heaviest set: 70-80% of 1 rep max
Reps in heaviest set: 8-12
Load for feeder set: 40-50%
Reps for feeder set: 20-25
Load of heaviest set: 60-70% of 1 rep max
Reps in heaviest set: 12-15
Load for feeder set: None
Reps for feeder set: None
Load of heaviest set: below 60% of 1 rep max
Reps in heaviest set: over 15
Load for feeder set: None
Reps for feeder set: None
Former Olympic team member Bill March experimented with a type of training called "functional isometrics" and it improved his lifting performance at an astounding rate. Of course, data also suggests that March was one of Dr. John Ziegler's first guinea pigs for Dianabol use. Because of this fact, functional isometric training was dismissed on the grounds that March's gains were due to the drugs and not the training methods. That was a big mistake in my opinion!
First of all, March took only 5-10mg of Dianabol per day. That's an extremely low dose, especially considering that using ten to twenty times that amount in conjunction with other drugs is considered a "normal" cycle by most bodybuilders! So, although the 5-10mg of D-bol per day probably did make a difference, it can't alone explain the absolutely phenomenal gains made by March.
I recently tried the old March routine myself. I started the routine in March (how appropriate!) as part of my "comeback" to Olympic lifting training. Within two weeks, despite losing over 30 pounds of bodyweight, despite much lowered leg strength (we're talking about a 75 pound decrease in my max back squat), and despite not having practiced the lifts for over four months, I actually cleaned more than my all time best! And the lift was easy! Oddly, my snatch didn't improve nearly as fast (my snatch always improves faster than my clean). I reasoned that since I didn't use functional isometrics for the snatch but did so for the clean, there was something going on!
But let's back up a little. What are functional isometrics? Well, isometric training refers to exerting strength without movement. The most classic form of isometric training is pushing or pulling an immovable load. Since you can produce more force during an isometric action than during a concentric action it's arguable that isometric exercises can lead to greater strength stimulation. However, there are some problems with pure isometric training:
- It's impossible to quantify progress. Since you're not moving a load, you don't know if you're improving, or if you're exerting maximal effort or not. This can surely decrease progression and motivation.
- Isometric training is angle specific, meaning that you'll gain strength only at the joint angles being worked. (There's only a 15 degree carryover of strength gains.)
Functional isometrics are a bit different: you still exert force without movement, but you're actually lifting a load. Let me explain. You start the bar as a specific height and lift it two to three inches, then you hold the position for six to ten seconds. You keep on adding weight until you can't lift and hold it for at least six seconds while maintaining a good lifting posture. This way you're actually lifting weights and can quantify your progress. But the problem of joint angle specificity still applies. That's why we want to use three pulling positions working the whole range of motion of a power clean. The three positions are:
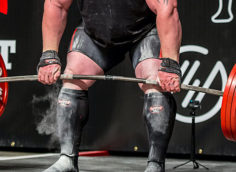
A. Deadlift
Bring the bar from the floor to the knees and hold for 6-10 seconds.
 |
B. Mid-pull
Start the bar one inch above the kneecap and lift it to mid-thigh. Hold for 6-10 seconds.
 |
C. High pull
Start the bar at the same position as in drill B, but bring it high. In the holding position the bar should be at least two to three inches above the navel. You should be standing on your toes, shoulders fully shrugged, arms bent slightly. Hold that position for 6-10 seconds.
 |
A key point in doing this routine is to never use straps. One of the benefits of this form of training is that you'll be able to hold much heavier weights than you can use in the clean. This will vastly improve grip strength and will help you psychologically. (If you're used to feeling 100 to 200 pounds more than you can clean, you'll be much less intimidated when attempting a big power clean.)
Another important thing to remember is to take isometric positions specific to your clean technique. To reap the most benefits from this form of training, you must duplicate your cleaning mechanics as closely as possible.
This isometric routine is performed twice per week and should last between 20 to 30 minutes. After, perform four to five sets of cleans working up to a max double or a max triple.
This concludes this first edition of "Rapid Fire." Hopefully it gave you a few good ideas to spark up your training program! Stay tuned for more tips in the future!
related posts

Tip: The New Cardio – Steady State Lifting

Tip: Do This Exercise Combo to Prevent Shoulder Pain

Tip: Does Rest-Pause Training Actually Work?